Pages

Showing posts with label off-camera flash. Show all posts

Sunday, October 12, 2014

Second Look

Recently, I shot a bottle of Rakia from Bulgaria (Stress Reliever) which proved to be really tricky to shoot. I reused the light setup to take another take on the vodka bottle that I shot a few months back when I was "Reviving The Kit" lens.

Light Diagram from the Rakia Bottle shot
I'd show the vodka bottle that was shot a few months back and the a few weeks ago side-by-side. I'd love to hear what you think is better.

Reviving The Kit Second Look

So, what do you think is better?

Sunday, July 06, 2014

Reviving The Kit

It's been more than three years since I replaced my kit lens (Canon EF-S 18-55mm f/3.5-5.6 IS) due to busted AF function. I rarely use it right now and usually I resort to it when I do macro photography via reverse ring or tube extensions.

I tried to use it as the primary lens for my project this weekend and tried to check and see how it still performs on product photography that I have been doing for several weekends now.

Toblerone

Sunday, January 05, 2014

Us In 2014

Trying out this photo inspiration: http://500px.com/photo/18139723.


Cheers to 2014!

Thursday, January 02, 2014

Chicken Buffalo

Recently, my wife's Chicken Buffalo has been a hit!

The first time I brought my wife's version of Chicken Buffalo in our office was during my birthday celebration. Actually, all the food that was prepared were given all a thumbs up but the Chicken Buffalo stood up from the rest and had repeat orders.

Tuesday, November 08, 2011

Be Your Own...

It's been awhile since I wrote a post and I hope that this new post can be an interesting one.

Be your own boss is what I can think of to finish the hanging title when I see the photo below.


Thursday, May 05, 2011

Who Wants Pear?

Related to my previous post: Back To Stock. Here's one of the unlucky ones that didn't made the cut. Actually, it's a good thing it didn't as I wanted to share how I lighted this and how I really liked the way it came out.

f/5.6, 1/60 sec, ISO 100
I had the pear on a transparent glass lined with tracing paper and a CFL bulb beneath the glass. Yes, this was a back-lit subject. I had to touch up a little flash on the upper-left corner of the pear. This then created  a crescent-shaped shadow. I had to lift up that shadow to reveal some details there by placing a white cardboard opposite of the flash. The flash was diffused by a DIY 12"x12" soft box.

The highlight and shadow defined the shaped of the pear while the back light revealed some texture - a bit wrinkled up. The pear seems to float as there are no shadows on the sides or beneath it.

The photo of the brown bear in 'Back To Stock' post had the same lighting applied.

Monday, March 07, 2011

Studio or Not?

Previously, I posted my favorite photo from a recent portraits photoshoot session here. That was ambient light only. These ambient light only shots were only additional shots after the actual session.

Here are some of those studio shots -- not!


I was commissioned to do some portraits to be used for a debut invitation. Client wanted a studio session but I didn't have one so I improvised. The client was willing to go to our place and I planned out where the shoot will take place and I've picked our veranda which was spacious enough to move around and of course it has lots of good ambient light!

I didn't rely only on the ambient light that's coming from the left of the subject. I had to mix it with artificial light from my flash. I positioned it at the subject's right side to act as a filler so I'll have two sides with light. Balancing the output of the flash was a bit tricky since I have one light source that's varying in intensity as the clouds move across the sky. :) I guess that's why on the first photo, the right side has a warmer (yellow-orange) light.

Here's an overview of my setup. Can you see Mr. Sun on the right side smiling? :)


I would like to have more opportunities to have this kind of sessions in the coming weeks. :)

By the way, I did edit a little on the background to make it that white and remove the not so visible creases on the white cloth used in the background.

Original Background Edited Background

With additional lighting, I could have done it without any editing. Next stop, additional light. :)

Cheers!

Thursday, February 24, 2011

Back Lighting and Rim Lighting

The past weekend, I wanted to copy a two-light setup: Key light and Back/Rim Light. I only have one flash on-hand that made it a little tricky. I'm really thankful for the Internet -- it's easy to get information on this topic, actually on any topic. I was able to read lots and learn lots of techniques on how to do it and thus the first photo:


Okay, I used the sun as my back/rim light and the flash to light up the subject's face. The back/rim light acts as a separator between the subject and the background. Here's another photo from my experiment on the technique.


If you will see the back lighting on the hair that made a separation on the dark background add dimension to the photo. If the back lighting on the hair was not present, the subjects head would tend to blend in with the dark background.

I'm looking forward for another session on this experiment.

Cheers!

Saturday, January 08, 2011

Extracting Creative Juices with Smoke Photography

Once again, Happy New Year to all!!!

I wanted to start the year with something creative and I've come up to try and do some smoke photography to squeeze out those creative juices from all those smoke.

First of all, what is smoke photography? Well I guess it explains itself and I don't need to expound on what it is really about. It's simply taking photos of smoke and out of those smoke we try to make something out of it. (DISCLAIMER: This is my first try to do this kind of photography. A little How-To-Do-It below and I'm sure it's bound to change upon trying it again.)

Randomness - Here's a photo of just plain smoke randomness and I can't make anything out of it. IT'S my first time.


Alienate - Here's a photo which I think looks like an alien with those big black eyes that appear on the upper right corner or a skull of some sort. A little eerie but it looks cool and wonderful.


Golden Hour - Here's an edited smoke photo where I just combined a portion of a smoke photo and try to create something else of those piece of smoke photos.


So, how did I do it? Here's how:

Materials:
  • Match - to light up the incense stick or candle;
  • Incense or Candle - source of smoke. I used candle this  case;
  • Room with minimal to no wind - so the smoke won't just disappear  from the passing wind;
  • Camera - to take photos of the smoke (of course);
  • Tripod - to steady the camera as you take the photos; and
  • Flash (off-camera ideally) - to light up those smoke
Camera settings (bound to change on my next attempt for sure):
  • Narrow aperture (Large aperture value) - in my case I used f/11 and f/13. This is to get as much DOF since we can't really predict the motion of smoke;
  • Shutter speed (experimental) - I switched mine to bulb mode which means I determine how long the shutter is open. From my takes, 1 second was the value. I guess setting the shutter speed at the flash sync value will do it as well (I believe);
  • Low ISO - in my case 100 is my lowest. This is to isolate the exposure on the smoke being lit by the instantaneous burst of light from the flash and avoid noise;
  • Flash power - I dumped full power of my flash in order to illuminate those smoke particles since we're  using a narrow aperture and not taking long exposures;
Steps:
  • Set-up materials and camera as shown in the diagram below;
  • Pre-focus on the source of smoke then switch to MF (Manual Focus) so there'll be no refocusing on the next shots;
  • In my case, a little light that comes into the room helps in order to see the smoke;
  • Take photos when the candle was about a second blew-off (by my daughter);
  • Repeat, adjust, and shoot as your heart desires;

Setup:

Final notes:
  • The speedlight was snooted in order to control the direction of the light coming from it and also preventing the spread of light into the background (we want it to be black so that the illuminated smoke particles appear) and into the camera (avoinding flare as the light is somewhat towards the camera);
  • Color of the smoke was done during post processing (GIMP's Colorize function was used);
More photos/creations in here:

Smokin' Hot!

    Tuesday, June 29, 2010

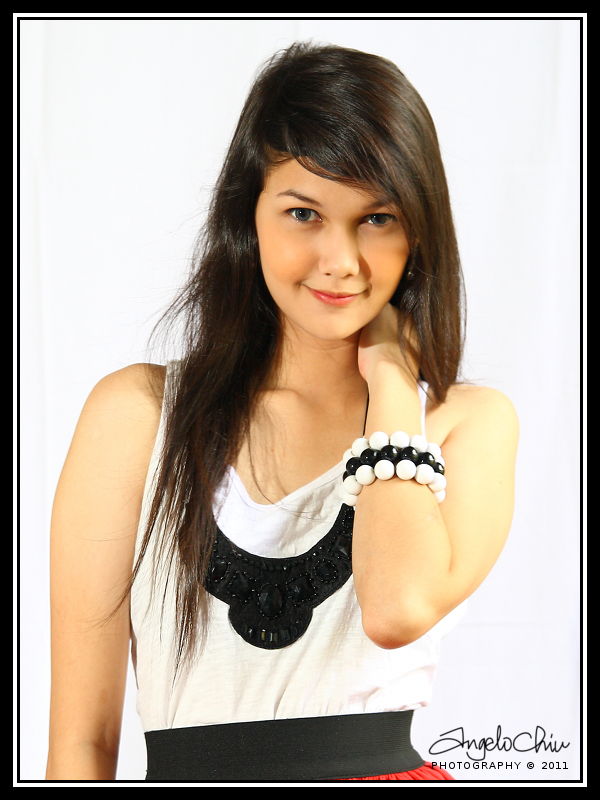
    Portrait Photo Shoot

    Last weekend I had a chance to do a portrait photo shoot. It was more of a cramming photo shoot. I wanted to enter a photo contest in Digital Photographer Philippines for their anniversary event. The deadline was set on June 27, 2010 at 5:00 PM. Unfortunately, that week my work schedule was from 12:00 NN until 8:00 PM equals busy.

    But fortunately, was able to talk to one of my wife's cousin on Friday (June 25) and asked her if she could be my model. She declined but asked her other cousin if she wanted to be one. This other cousin wanted it but had some trouble with the schedule as this was sort of unplanned thing. It was very fortunate that we were able to agree on a time and place the next day, Saturday (June 26).

    I was very fortunate that the weather was great -- not too sunny and not too cloudy. It was just right. Anyway, to cut the story short.. I had a wonderful photo shoot and was able to submit photos for the contest. It's too bad that I can't post my entries here but I can still share some of the other photos that I didn't select as  entry.

    Your comments will be greatly appreciated! Thanks!


    And more in here:

    Portraits: Arisse: Slideshow

    Wednesday, May 19, 2010

    Back To Water Drops

    From my recent entry (Revisiting Water Drops), I have mentioned that I'd do my water drops again with my 50mm prime lens with the 580EX II flash. Tonight is the night that I went back to the water drops. An additional part of the experiment was to use wireless flash triggers. This would be a separate entry but to give you an introduction, in this way, the flash is not mounted on the camera's hot shoe slot but instead is placed somewhere else and triggered by wireless receivers.

    So, my first task was to set the aperture and the flash output. At first, I went with a large aperture but I was having getting focused drops due to the thin DOF. I therefore ended up using f/8.0 with ISO 100, 1/200 sec shutter speed.

    I'm really impressed how the prime was doing as I have a high success rate of getting whole drops of water. Without further due, here are some of the water drops I was able to get:


    I call the first one as the "Magnifying Glass" and the second as the "Orb".

    I have the rest of the set in here: Water Drop Project.


    Water Drop Project